This blog is written for Beta release of SharePoint 2010. As of Beta, Secure Store Service is available on SharePoint 2010 but is not available on SharePoint Foundation.
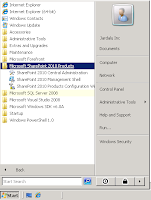
 Secure Store Service (SSS) adminsitration can be done through the central administration of SharePoint. Central adminstration can be started from the Start > Microsoft SharePoint 2010 Products > SharePoint 2010 Central Adminstration ( see image 1 ).
In the Central Administration page, click Manage services on server (within System Settings block ) to load the Services on Server administration. Make sure the Secure Store Service is in Started mode. If the service is not in Started mode, click on Start link for Secure Store Service. This would start the Secure Store Service.
SharePoint 2010 can host mutliple applications of the same type within a farm. Secure Store Service is actually a Shared Service in SharePoint. In the Central Administration, click Manage service applications ( within Application Management block ) to load the service applications page. It shows all the Shared Services Application ( and Shared Services Application Proxy ) within the farm. To create a new Secure Store Application, click on New button and then select Secure Store Service ( see image ). If you have installed SharePoint in standalone mode, there should already be a Secure Store Application with the name "Secure Store Service" running.
In the Create New Secure Store Service Application dialog box, choose appropriate name for your secure store. When creating a secure store, you will need to choose a database server and database where secure store will store its information. Secure Store Service will automatically create database for secure store application . Secure Store Service supports both Windows authentication and SQL authentication for database creation. It is recommended that you use Windows authentication. When windows authentication is used, make sure the farm administrator has DB create permission on the database server.
You will also need to choose a web application pool which secure store will use to host its service. You can choose one of the existing application pools or create a new application pool. For secure store, it is recommended that you always choose a new application pool. When creating a new application pool, choose a managed account which will be the owner of the application pool. Since secure store stores confidential information, always choose a managed account which is a non-interactive account ( account that does not have login privileges ). The account that is used in secure store application pool can decrypt confidential information from secure store database, so you should be very careful in choosing the account. Click OK to create the application.
Once the secure store application has been created ( or pre-existing application with Standalone installation ), you will need to set a passphrase for the application. This done by clicking on the application link ( Central Administration > Manage service applications ). This will bring the secure store application adminstration page.
Click on "Generate New Key" to generate a new key for secure store application. Every secure store application needs a key to encrypt/decrypt the stored information in database.
When generating a new key, you will need to supply a pass phrase. Pass phrase is used by secure store to protect the key itself. Pass phrase must be atleast 8 characters long, must contain atleast one numberal, one capital alphabet and one special character. This pass phrase is not stored in the secure store, so make sure that you keep a copy of the pass phrase securely.
Now Target applications can be created on secure store. Target application is a secure store concept where the credentials of the users can be grouped together. Within target application you define what kind of information will be stored. For example, you may want to club all user connecting to CRM in one target application.
To start with, you need to define the target application. Fill the information for target application as asked by the screen. Click Next. On the next page, you can define what user information will be stored in the target application. For example, for CRM target application, we will be storing user name, password, system number, client number and language. To add a new field type, click on the "Add Field" link. At the user input time, if you want to mask any field, check the mask checkbox corresponding to the field.
Each target application can be managed by its own administrator. The next page asks you to define an administrator for the target application.
Click OK to finish the creation of the target application. At this time the target application is ready to be consumed by applications such as web-part, external list, etc.
Farm administrator ( or target application administrator ) can now set user credentials/information for this particular target application. To set the user credentials, right click on the target application ( see next image ) to bring the entry form.
The next page will ask you to enter the user credentials for CRM.
Secure Store does not display the list of the credentials owner for a target application for security reasons. So in other words, there is no way to figure out if a credential has been set for a particular credential owner through Secure Store UI.


